How to run Linux on Windows
This tutorial is not about installing Linux on bare metal nor about dual booting along with Windows however we are going to do it the easy way. The magic word here is virtualization. We will run Linux on Windows using virtual machines. There are so many advantages of virtualization in general but this topic is beyond the scope of this tiny article. I will be using my 64 bit Windows 7 machine as the host operating system. The Linux virtual machine is going to be a guess operating system. Though Linux in this case is virtual it behaves like a real physical machine however it consumes computing, memory and storage resources from the windows physical machine. Please follow the steps below:
Using VMware Player
-
- Download VMware player from: http://www.vmware.com/download/player
- Click the link “VMware Player”
- Once the download is completed. Install it using the provided windows installer. Follow the instructions and keep the default settings
- Download a VMware virtual machine image of Ubuntu Linux from: http://www.trendsigma.net/vmware. You can select the version as you wish
- Once the download is completed extract the zip file to some location
- Launch VMware player
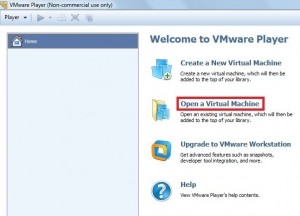
- Click “Open a virtual machine”
-
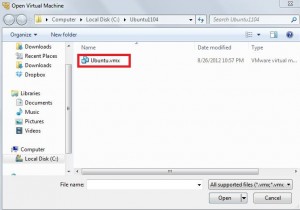
- Navigate to where the virtual machine image was extracted then open the vmx file
-
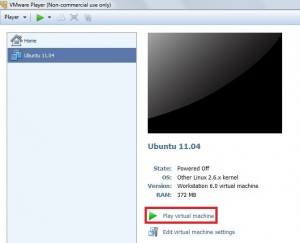
- Click “Play virtual machine”
-
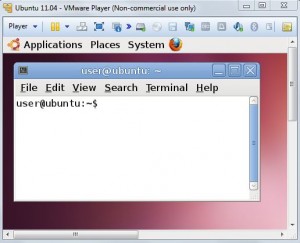
- That is all you need. You have now a Linux machine up and running
Using Oracle Virtual Box
I like this method more than the previous one as I noticed it is a better experience and faster as well. Follow the steps below:
- Download VirtualBox from: https://www.virtualbox.org/wiki/Downloads
- Select VirtualBox for Windows hosts (x86/amd64)
- Once the download is completed invoke the windows installer and follow the instructions using default settings
- Download a free Ubunto Linux virtual image from: http://virtualboximages.com/Free.VirtualBox.VDI.Downloads
- Once the download is completed extract the compressed file to some directory
- Restart your windows machine then press F1 just after shutdown in order to enter the setup
- Go to security menu
- Select Virtualization
- Enable both settings: Intel Virtualization Technology and Intel VT-d feature
- Save and exit
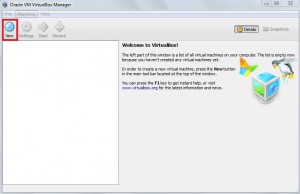
- After windows boots up open VirtualBox/li>
- Click New then next
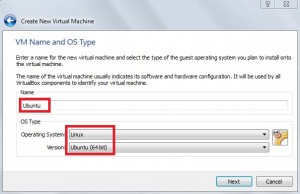
- Give the virtual machine a name for example Ubuntu and select the OS and version
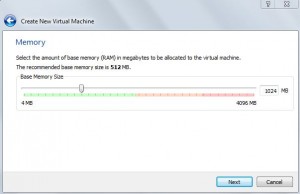
- Specify the amount of memory allocated to the virtual machine for example 1G
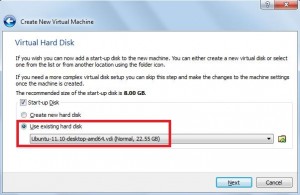
- Create a virtual hard disk using an existing one. You can navigate to the directory contain the virtual image we just extracted in step 5 then click create button on the next screen
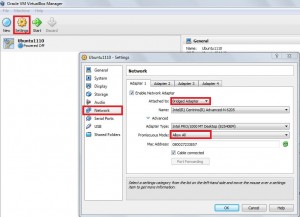
- Enable bridge mode network setting so that the VM and Windows can communicate with each other
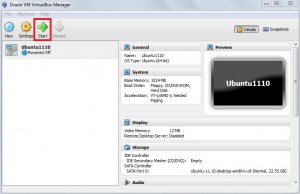
- Start the virtual machine
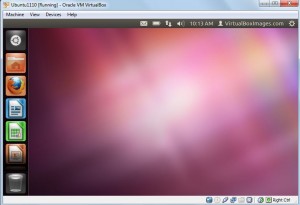
- After Linux boots up it will ask for a user name and a password. The default user name and password for our installation is adminuser. You should now have Linux up and running
Note: If you need to clone the original VDI file and create a new VM you might encounter an error message saying can not register the hard disk because it already exists in the media registry. The solution is very simple, just execute the following command from windows command line:
|
1 |
C:\\path\\to\\VBoxManage.exe internalcommands sethduuid "C:\\path\\to\\new\\vdi\\file" |
Thanks for reading.
About Author
Mohammed Abualrob
Software Engineer @ Cisco
